 Songtemachine

Water Well Drilling Rig Selection Guide: Reptil, Truck-Mounted, or Trailer-Mounted?
If you are searching for a water well drilling rig for agricultural irrigation, domestic water supply, dewatering, or geological exploration, and you are comparing crawler-mounted, montado en camión, and trailer-mounted configurations across drilling depth ranges from 100 m to 800 m, the key question is rarely “which rig is the best” but rather “which rig matches my jobsite conditions.” This guide breaks down the fundamental differences between the three chassis types, the complete drilling process from spudding to well completion, and the operational pitfalls that most often cause downtime or downhole problems. By the end of this page, you should be able to identify the right rig category for your work—and know how to use it safely and efficiently once it arrives on site.
Water Well Drilling Rig Series
Truck Mounted Drilling Rigs Series
Trailer Mounted Drilling Rigs Series
1. Chassis First: Reptil, Camión, or Trailer Determines How You Reach the Jobsite
The three chassis types reflect differences in jobsite conditions, not simply tiers of quality or capability. The first layer of selection logic should start with three questions: Where are your well sites? What are the road conditions? How often will you mobilize?
Crawler-Mounted Water Well Drilling Rig — First Choice for Difficult Terrain
The core advantage of a crawler chassis is low ground pressure and self-propelled mobility, making it suitable for mountainous terrain, farmland, soft ground, and muddy sites after rain. If your well locations are scattered and road access is poor, a crawler rig reduces the cost of building access roads and towing. Typical drilling depth coverage is 180–500 m, compatible with both DTH hammer and hydraulic top-drive drilling methods. The operational convenience of a crawler rig on difficult terrain depends heavily on proper site leveling and outrigger adjustment—covered in the drilling process section below.
SW-350C Crawler Water Well Drilling Rigs
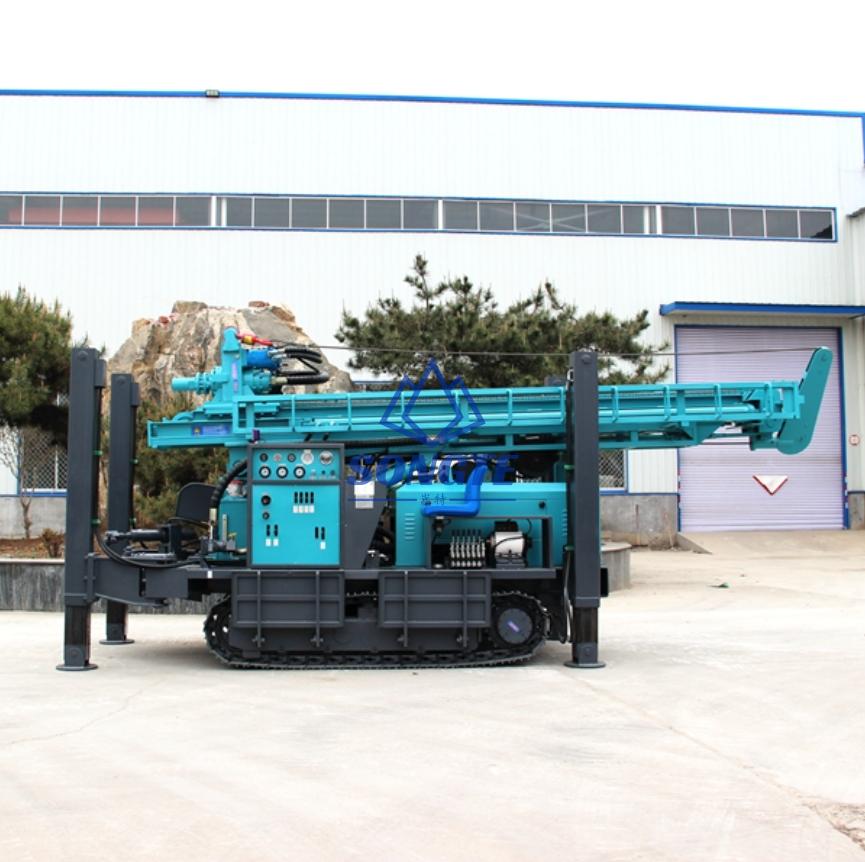
Crawler DTH Drilling Rig Models
Truck-Mounted Water Well Drilling Rig — Mobility and Rapid Mobilization
Truck-mounted rigs use a truck chassis for fast highway travel, making them suitable for projects with widely spaced well sites and good road access, as well as emergency water supply operations. Drilling depth ranges are broad, with configurations from 200 m to 600 m available, but the carrier’s load capacity must be matched to the rig’s weight and drilling forces. If you need to move between regions frequently, the overall mobilization cost of a truck-mounted rig is typically lower than that of a crawler or trailer rig.
Truck-Mounted Water Well Drilling Rigs Models
SW-180T Vehicle Mounted Drilling Rig
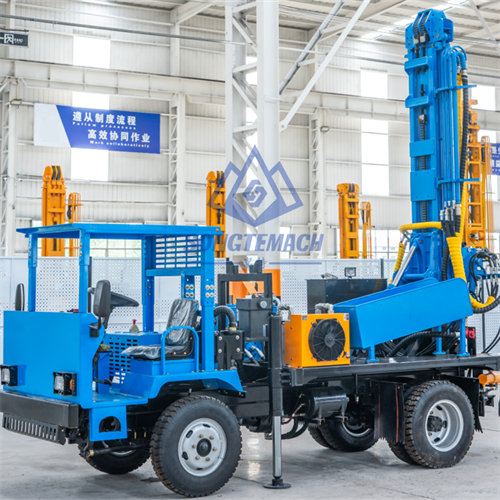
SW-300T Truck Mounted Drilling Rig

Trailer-Mounted Water Well Drilling Rig — Economical Choice for Small Projects and Domestic Wells
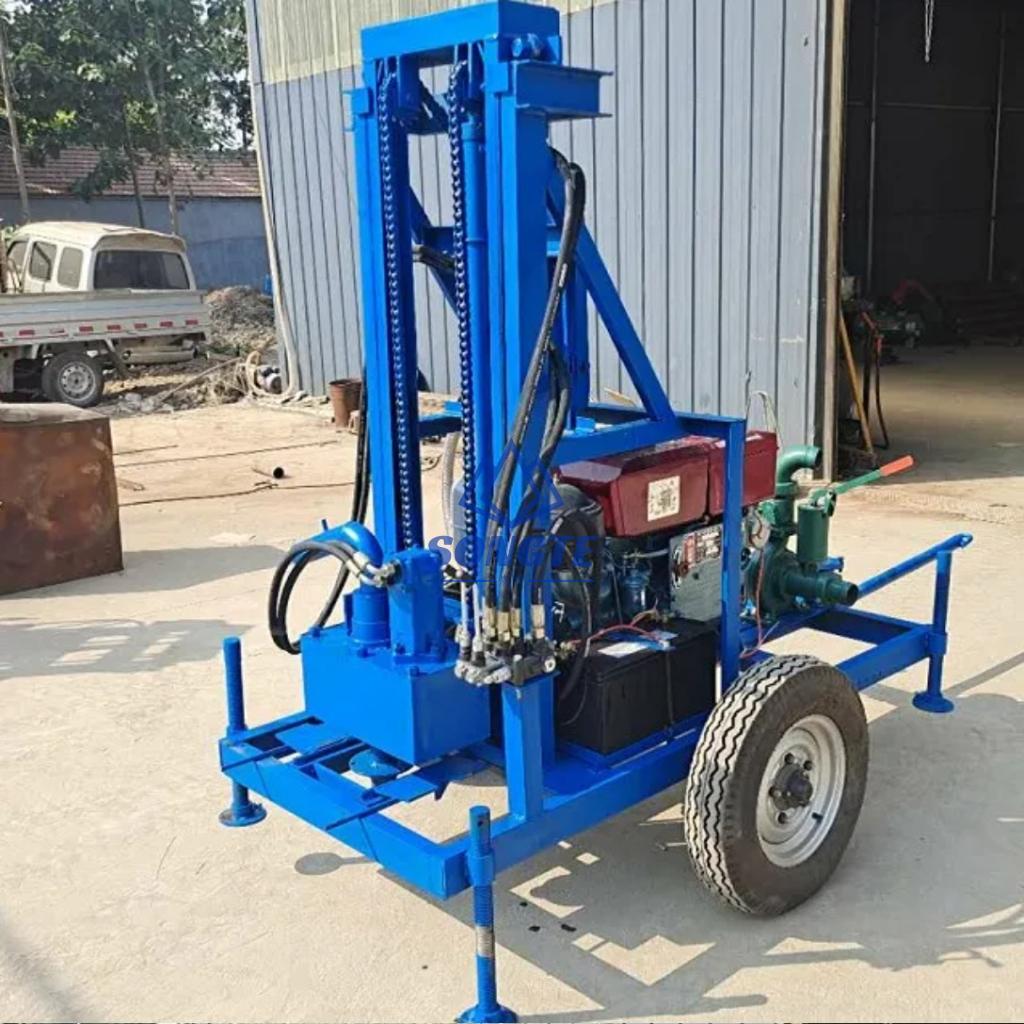
Trailer-mounted rigs are compact and easy to tow, suitable for small water well projects, domestic drilling, and remote locations. A typical model such as the SW-150W trailer rig can be moved without a crane—an ordinary pickup or farm vehicle is sufficient for towing. The trade-off is the absence of self-propulsion: moving around the site depends on a towing vehicle, and maximum drilling depth is generally lower than the other two categories.
Trailer-Mounted Water Well Drilling Rigs
SW-200C Trailer Mounted Water Drilling Rig

SW-200WT Tractor Mounted Water Drilling Rig
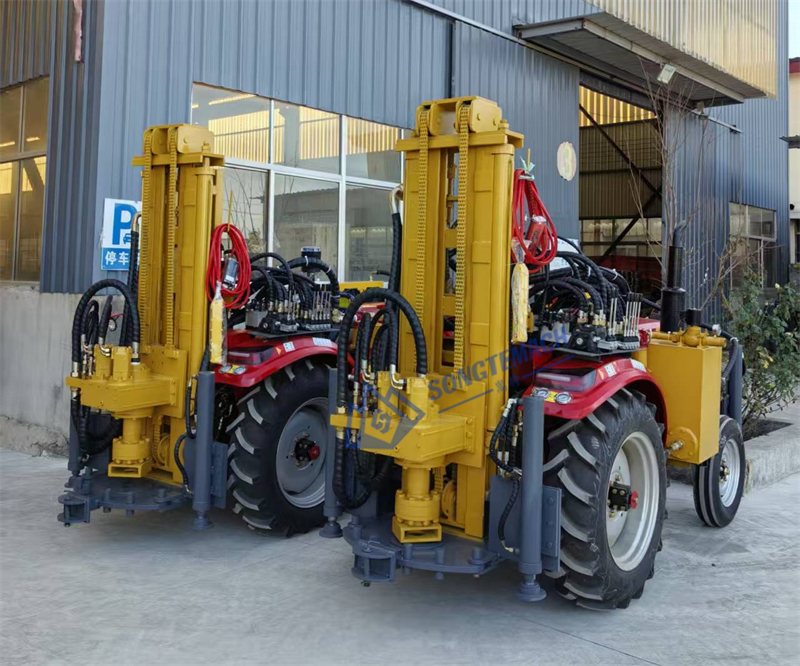
SW-150W Small Water Well Drilling Rig
2. Drilling Depth and Hole Diameter: The Selection Traps Behind the Spec Sheet
This section does not simply list parameters—it explains how they interact and where buyers commonly misjudge.
Point 1: Drilling depth is not a single number. The same rig may achieve a finished well depth that differs by 30–50% between soil and weathered rock formations. Rated depth is typically based on a specific drill string configuration and formation conditions. Selection should be based on “your geology + your required hole diameter,” not the maximum depth figure alone.
Point 2: Large diameter and deep drilling are often mutually exclusive. The larger the hole diameter, the higher the required torque and lifting force. The achievable depth of the same rig at 350 mm diameter is typically significantly lower than at 105 milímetro. If your well requires a large-diameter casing, the effective drilling depth must be recalculated. Además, rated depth is directly tied to the drilling method—DTH drilling efficiency in hard rock is heavily influenced by air compressor flow and pressure, while hydraulic top-drive in clay layers requires attention to mud properties and cuttings transport capacity. Discussing depth without the drilling method is meaningless.
Point 3: DTH vs. hydraulic top-drive—choosing the technical route. DTH hammers offer high efficiency in hard rock but require a matched air compressor. Hydraulic top-drive performs more stably in soil and soft rock, with better safety during rod handling at the wellhead. The choice should be based on the formation report, not price comparison alone.
3. Quick Selection by Application: Three Typical Buyer Profiles
Scenario A: Agricultural irrigation wells, 80–200 m depth, well sites scattered along rural roads
Prioritize trailer-mounted or small truck-mounted rigs. Mobility is flexible and cost per well is controllable. A 100–200 m trailer configuration covers most requirements.
Scenario B: Mountainous drinking water projects, 200–400 m depth, poor road access
Crawler-mounted rigs offer clear advantages. Focus on crawler chassis gradeability and modular disassembly design so the rig can be broken down for transport where no road access exists.
Scenario C: Deep wells or dewatering, 300 m+ depth
Truck-mounted deep-hole models or large crawler rigs. Verify carrier load capacity, mast load rating, and winch lifting capacity, and confirm the air compressor or mud pump package.
4. Water Well Drilling Process: From Spudding to Well Completion
This section answers the question: “Once the rig is selected, how is the work actually done?” The three chassis types share the same core drilling logic—differences lie mainly in mobilization and site setup. The following follows the construction sequence.
Step 1: Site Preparation and Rig Positioning
The thoroughness of site preparation directly determines whether the hole will deviate or the drill string will get stuck. First clear vegetation and topsoil, and level an area large enough for the rig, auxiliary equipment, and material storage. When positioning the rig, mark the hole location with a steel tape, level the machine, and secure the chassis. Soft ground requires compaction with lime-soil or cement piles to prevent tilting or shifting during drilling. For crawler rigs, confirm even contact of outriggers or tracks; for truck-mounted rigs, extend and level the hydraulic outriggers; for trailer rigs, ensure the towing hitch is disconnected and the chassis is firmly supported.
After the mast is raised, the crown block, Mesa giratoria, and borehole center should be aligned on a plumb line—this is the basis for hole verticality control. On crawler and truck-mounted rigs, the hydraulic mast raising system must be operated slowly and precisely as it approaches vertical to prevent overshoot.
Step 2: Drilling — Choose the Method Based on Formation, Not the Other Way Around
The drilling method is determined by the formation, not by whatever function the rig happens to have.
Unconsolidated formations (suelo, arena, grava): Mud rotary drilling or percussion drilling is commonly used. The mud serves to cool the bit, suspend and carry cuttings, and stabilize the borehole wall. Mud density is typically controlled at 1.1–1.3 g/cm³, viscosity 18–22 s, with low sand content. Control the rate of penetration—do not feed too fast in unconsolidated layers. Measure hole depth and record lithology changes every 10 m or so. If cobble layers or narrow sections are encountered, pull the string and adjust before continuing to prevent deviation.
Bedrock formations: DTH hammer drilling is more efficient. High-pressure air from the compressor drives the hammer to break rock, and cuttings are carried out of the hole by the air stream. This method achieves fast penetration in hard rock but requires matched compressor flow and pressure—you cannot achieve rated depth with just any compressor. If the rig supports hydraulic top-drive, top-drive rotation is more stable in soft rock and soil, with better wellhead safety.
Key operating principles: Start the mud pump before spudding. Wait until mud returns at the surface before engaging the rotary drive. Use reduced feed in overburden so the full weight of the drill string is not applied to the bit. Monitor rotary sound, penetration rate, and drill pipe rotation closely to detect formation changes. Never drill dry—when drilling with clean water, do not apply feed pressure before water returns.
Step 3: Well Completion — Casing, Gravel Pack, and Development
Reaching target depth is only half the job. Completion quality determines the well’s yield and service life.
Circulation and mud replacement: After final depth, circulate to clean cuttings from the hole. Then replace the heavy mud with thin slurry or clean water from bottom to top to reduce mud density and prepare for casing installation.
Casing installation: Before running the casing, check that the screen wrap is secure. Centralizer spacing should generally not exceed 2 m to keep the string centered. Do not let the casing strike the borehole wall during installation. The bottom of the sump section is typically welded closed or fitted with a float plug to prevent mud from entering.
Gravel pack: Fill the annular space between the casing and borehole wall with graded gravel. Gravel size is typically 8–10 times the formation sand size. Placement must be continuous and even to avoid bridging and voids. Gravel pack quality directly affects sand content and well yield.
Well development: The purpose of development is to remove cuttings and mud/sand from the filter pack and surrounding aquifer, restoring flow channels. Common methods include high-pressure water washing, surge block development, and airlift development. Incomplete development results in yield significantly below expectation and sand production later.
Pumping test: After development, conduct a simple pumping test to measure actual yield. Take a water sample after 30 minutes of pumping to measure sand content. This serves both as acceptance criteria and the final checkpoint for completion quality.
5. Operational Precautions: Where Problems Most Often Occur
This section is not generic “safety first” advice. It lists the specific scenarios that most often cause equipment damage, downhole incidents, or injury during water well drilling operations.
Three “Don’ts” During Drilling
Don’t force the rig through a bind. If rotary speed drops suddenly, torque gauge readings spike abnormally, or engine sound becomes labored, the bit has likely hit a hard layer, a narrow section, or accumulated cuttings. The correct response is to stop feeding immediately, slightly lift the drill string, and adjust mud properties or rotation speed before retrying. Forcing feed is a leading cause of drill pipe breakage and bit damage.
Don’t keep the same parameters when the formation changes. When transitioning from soil to sand, or soft rock to hard rock, weight on bit, rotary speed, and mud properties all need adjustment. Operators should judge based on returned cuttings samples and penetration rate changes—not “one set of parameters for the whole hole.” Before running a sampler, disengage the rotary slips completely. Lower the sampler only after the bit is off bottom. Do not stop the mud pump during sampling.
Don’t perform unrelated tasks while the drill string is suspended. When breaking out drill pipe, lower slowly and lay down flat. Do not slam the clutch when engaging the rotary. Never stand beneath a lowered kelly. These rules seem trivial, but accidents often happen during “just one quick thing.”
Equipment Maintenance: Daily Actions More Important Than Repair
Check drill pipe threads every shift. Worn or damaged threads are a common cause of downhole incidents. Before installing drill pipe, check for blockage, bending, and thread wear. Reject substandard pipe. Clean threads and apply lubricating grease before connection—this significantly extends pipe life.
Don’t cut corners on the mud pump. The mud pump is the “heart” of the drilling process. Insufficient flow or unstable pressure directly affects cuttings transport and borehole stability. Before spudding, check pump rotation direction and inspect lines for leaks. Monitor return flow during drilling—reduced returns often indicate a downhole problem.
Stop the machine before changing gears. This is a basic rule, but operators still sometimes shift on the fly for convenience. Strictly prohibit gear engagement at high engine speed. If the gear will not engage, use the hand crank only—never force it with the engine running.
Water Well Drilling Rig Daily Maintenance Checklist
Chassis-Specific Precautions
Crawler rigs: Watch ground conditions when tracking. On slopes, adjust the mast angle to maintain a stable center of gravity. The crawler chassis is highly adaptable, but it is not an off-road vehicle—excessively deep mud or very soft ground still requires mats or road building. The cost of recovering a stuck rig far exceeds the cost of preparing the ground beforehand.
Truck-mounted rigs: Before road travel, confirm the mast is fully stowed and outriggers are retracted and locked. The truck chassis offers highway speed, but the weight of the upper structure affects handling stability—reduce speed on curves and wet surfaces. On arrival, extend and level the outriggers before raising the mast. Never rely on tires and suspension for support.
Trailer-mounted rigs: Keep towing speed moderate, especially on unpaved roads. After arrival, disconnect the hitch and firmly support the chassis before operation. Trailer rigs are compact, but depth capacity is limited—do not attempt to “stretch” rated depth by adding drill pipe. The chassis stability and mast load rating will not support it.
Water Well Drilling Rig Daily Maintenance Checklist
6. Frequently Asked Questions (Preguntas más frecuentes)
Pregunta 1: How much does a water well drilling rig cost?
Prices vary widely—from several thousand USD for a small trailer rig to several hundred thousand USD for a large truck-mounted or crawler deep-hole model. The main cost factors are chassis type, drilling depth capacity, power configuration (diesel/electric), and whether an air compressor and tooling are included. Determine your application and depth requirement first, then request a quote for the corresponding model. Avoid comparing prices across unrelated configurations.
Pregunta 2: How deep can a 150 m rig actually drill?
“150 m” typically refers to rated capacity under ideal conditions. In sandstone and gravel, the rig may reach or approach that depth. In weathered or hard rock, effective depth may drop to 100–120 m. Ask the manufacturer to confirm “guaranteed depth in your specific formation conditions.”
Pregunta 3: For domestic water wells, is crawler or trailer better?
If the well is in your own yard or field and does not require frequent relocation, a trailer rig is more economical. If access requires entering plots that vehicles cannot reach, or if the same rig will serve multiple scattered well sites, a crawler rig—despite higher initial cost—has lower long-term mobilization costs.
Pregunta 4: Mud drilling or DTH drilling—how do I choose on site?
Look at the formation. In soil, arena, arcilla, and soft rock, mud rotary is more reliable, with better borehole stability, but requires a mud pit and cuttings disposal. In hard rock and water-scarce areas, DTH hammer drilling is more efficient, but compressor costs are higher and dust control must be considered. Many jobsites use both: drill through the upper unconsolidated zone with mud, then switch to DTH after entering bedrock.
Pregunta 5: Does a new rig need a break-in period?
Sí. New equipment typically requires a break-in period of several dozen hours, during which full-load operation should be avoided. Monitor hydraulic system temperature, bolt tightness at all connections, and abnormal noise. After break-in, change the lubricating oil and perform a full inspection.
7. What to Read Next
After reading this guide, use your application scenario to navigate to the corresponding product category page for detailed model specifications. If you have already identified the rig type but want to learn more about auxiliary equipment (air compressor selection, tooling configuration, mud programs), contact us for a tailored recommendation.
Water Well Drilling Rig Series
Truck Mounted Drilling Rigs Series